

Table of contents


No headings in the article.

When building a web page, you would want all your links and buttons to stand out so that they can attract the attention of your page visitor to click on them, you don’t want to only change their color from the default which is black, you also want to change the font size and add some emphasis like hover effect and visited. To do this, you need CSS selectors. CSS selectors allow you to target the HTML element to be styled in your stylesheet. They are of different types and each has its unique function. Styling your web page with CSS Selectors sometimes comes with a thorn of conflicts, as this can be frustrating especially when you cannot directly figure out where the conflict originated, it can be avoided by following the best practice in styling. in this article, we will look at the types of CSS selectors and their specificity in order of importance.
CSS SELECTORS. Because CSS Selectors are qualifiers and define the element to be styled. It is important to know the unique function of each of them. Let’s take a look at the various types of CSS Selectors and their use cases.
ID Selector: This is used to target an element with a given ID attribute, it has the syntax “#” precede the id-name i.e. #idname. For example:
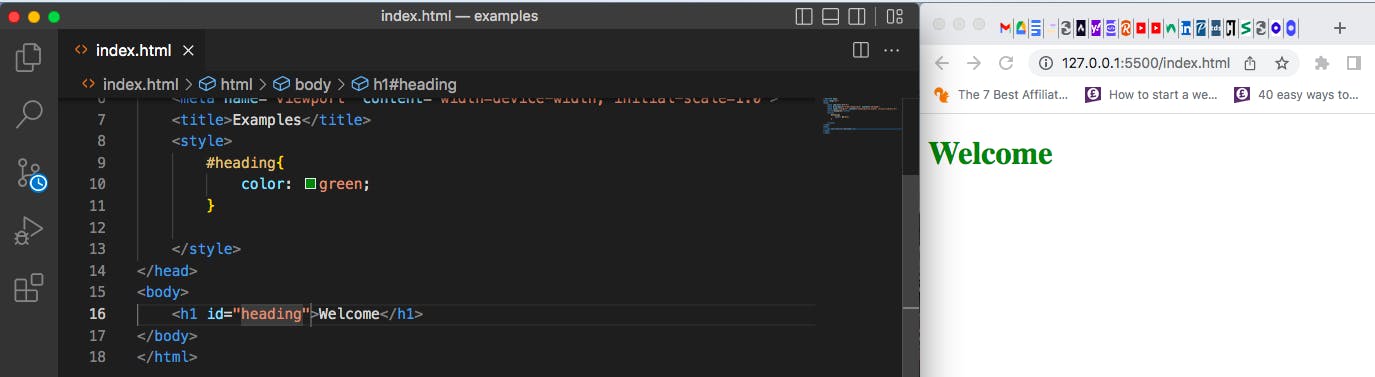
The “#heading” is ID Selector.
Class Selector: this target all elements with class attribute and have the syntax “ . “ preceding the class name i.e. .classname. For example:

The “.heading” is a class selector.
Attribute Selector: attribute gives further detail about an element and this is used to target all elements with a given attribute. It has the syntax [attr]. For example:
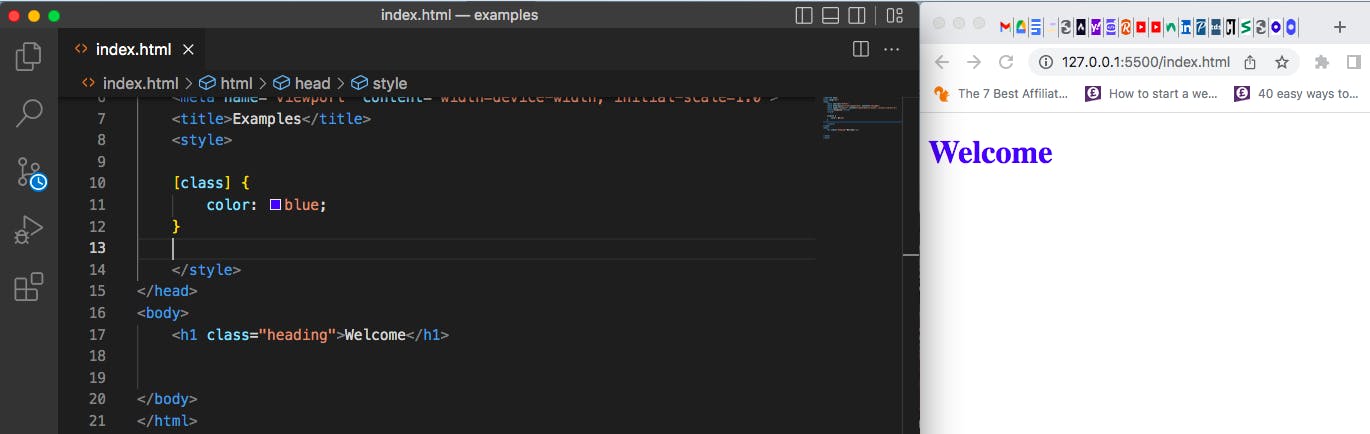 The “[class]” is an attribute selector.
Pseudo-class: this is used to target elements only in a specific state, like hover and visited. It has the syntax “: “ in between the selector and the Pseudo-class. For example:
Registerbtn:hover{ color: gray; }
The “bun: hover” is a Pseudo-class selector.
Type Selector: This is used to target an element with a specific node name. It is sometimes referred to as a tag/element selector because, it targets the HTML tag, and has the syntax “tag/element”. For example:
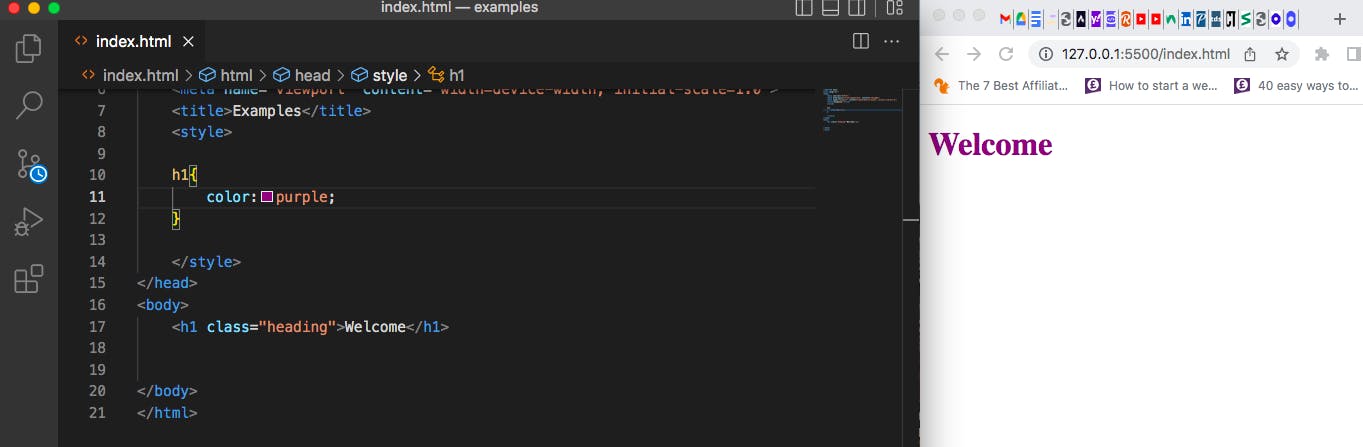 The “h1” is a tag/element selector.
Universal Selector: This is used to target the entire page. It has the syntax “ * “. For example:
*{ Font-family: Arial Helvetica San-Serif; }
SPECIFICITY AND HIERARCHY OF CSS SELECTORS. Specificity is the extent to which styling is specific to a particular selector. Since CSS Selectors are what the browsers used to identify the styling attributed to your HTML elements, it is important to understand the hierarchical order and the specificity rules the browsers use to implement your styling.
In the hierarchical order of styling of these CSS Selectors, the ID Selector has the most specific order of styling. It takes precedence over the same element with a different selector but the same style attribute., Class Selector, Attribute Selector, and Pseudo-class Selector all have the same order of specificity. While type selector has the list specific order of styling. The universal selector has no effect on specificity. We will look at some examples in the specificity rules below.
CSS SPECIFICITY RULES Before you begin to style your HTML document with CSS, there are some important rules you need to be familiar with. Let's take a look at them with some examples.
- it is important to note that, when you style your HTML element, the browsers will apply the rule with the highest specificity, in this case, the first thing to consider is the CSS styling method you want to use. Remember we have three different methods of styling in CSS. The inline method, the internal method, and the external method. While the inline method of styling is not a best practice, it has the highest order of specificity in the browser. The inline styling will take precedence over the internal or external styling of CSS. see the snippet below
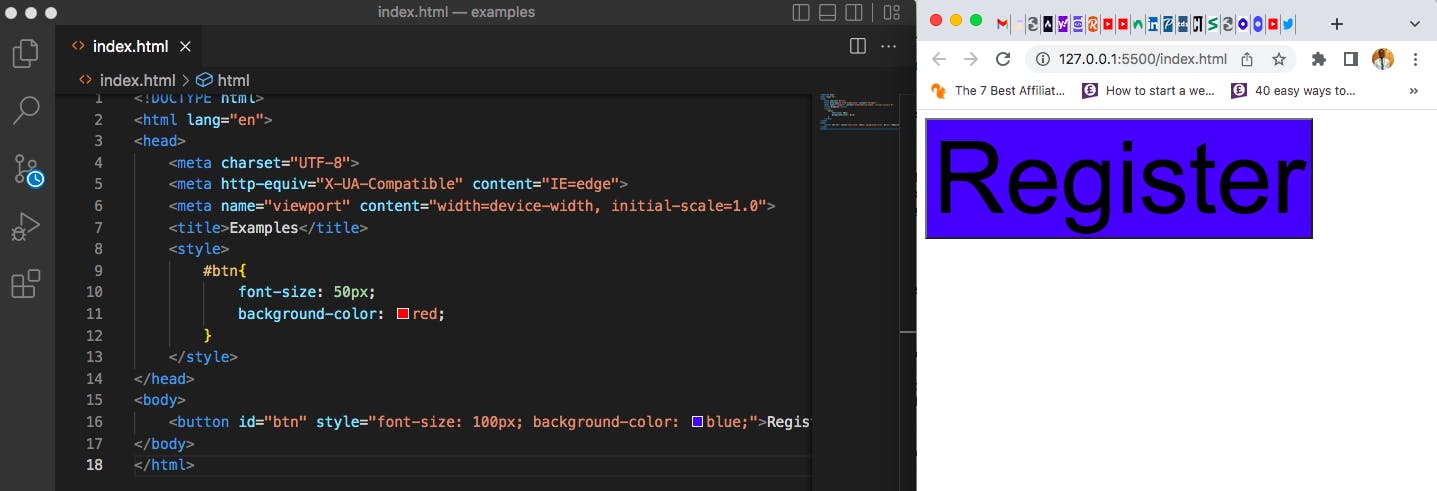
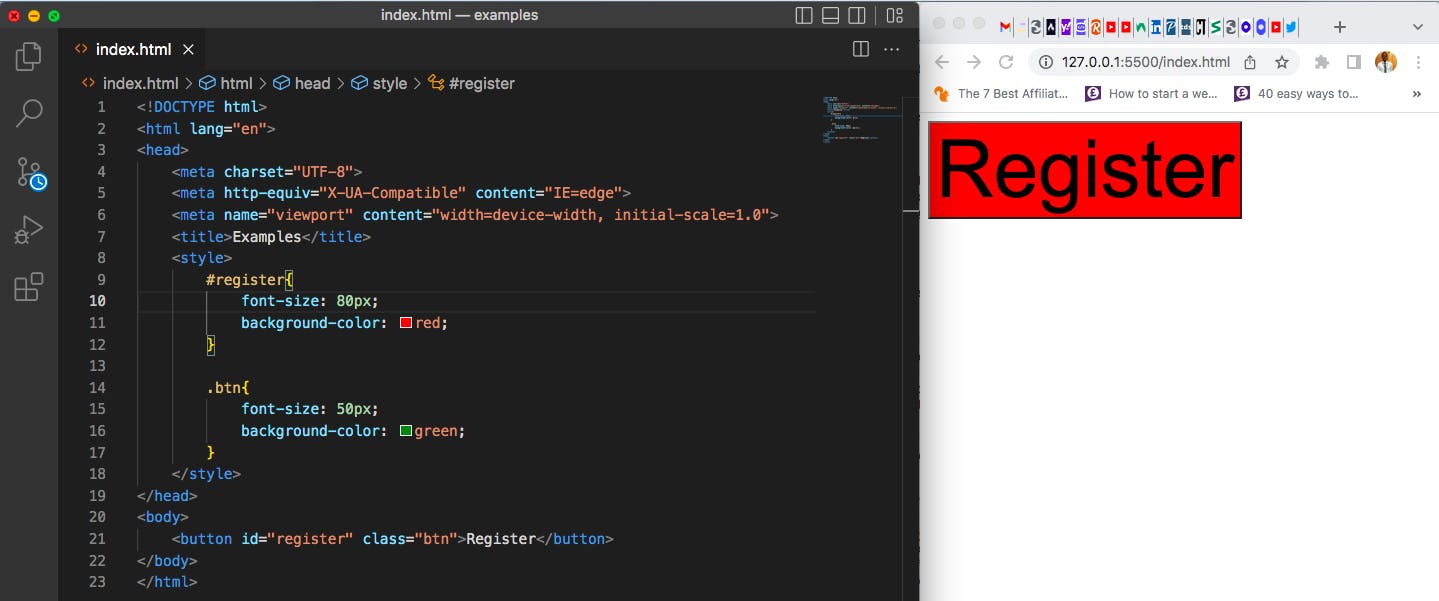
- When an HTML element is targeted with two or more selectors, the browser will implement the selector with the highest specificity. For example, say you want to style a button tag and you have assigned an ID and Class attributes. The browser will apply the ID selector over the class selector because #btn is the most specific. See the snippet below.
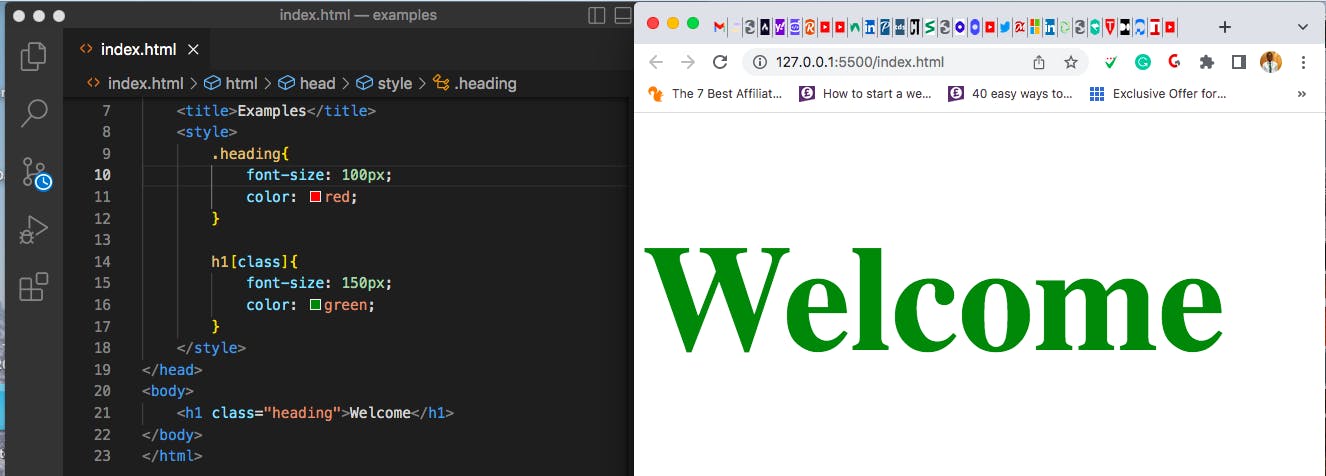
- When an HTML element is targeted with two or more CSS Selectors of equal level of specificity, then the browser will apply the CSS selector than come last. Take, for example, you want to style the heading of your document and you have assigned attribute and class selectors with two different properties for font size and color. Ok, let's style the above example differently with two different selectors of the same level of specificity. The browser will apply the second styling because it has the same level of specificity as the first styling, see the snippet below
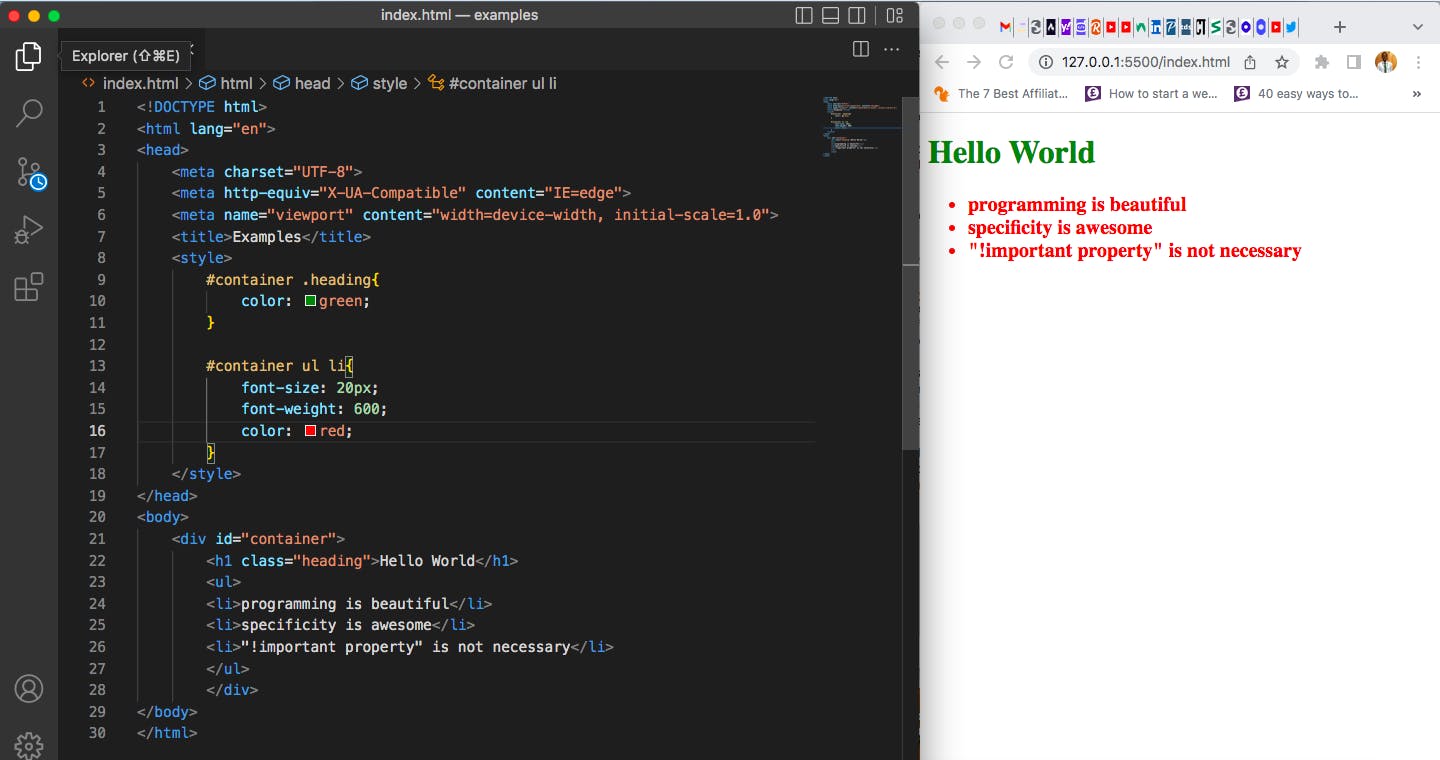
Now that you have understood how specificity works, I think there’s one more thing that may get you confused when styling with CSS selector specificity, and that is “!important property”. while some developers used the “!important property” to override specificity, it is not encouraged to be used in your CSS styling because, it breaks the natural cascading of stylesheet and this makes debugging and maintaining your web page more difficult, most especially when working with a team. You can take advantage of other specificity methods instead of the “!important property”. You can also use the multiple selector specificity methods for nested tags which I consider the most professional, more specific, and cleaner method of styling. Let's take, for example, you want to style an h1 element with a class “heading” and a list element that is nested in a div that has an ID of “container”. you can be more specific by targeting the list element from inside the div this way. Rather than using the “important property”. The browser will apply the style to the class heading and the li. See the snippet below.
When you use this method of specificity in your CSS styling, you will realize how many CSS selector styling conflicts you’ve avoided and how clear, neat and readable your stylesheet looks. So, when next you are to style your web page, consider using the best selector and specificity method and be consistent in whatever method you choose in the stylesheet, don’t use different methods to style a single stylesheet, not only because of yourself when you are returning back to make a change or debug a conflict but also because of someone else who will later have to work on your stylesheet in the future.
Oh! You read to the end, that’s awesome, you have learned one or two things from this article and as such you will deploy the best CSS Selector specificity practice in your subsequent web project. If you find this article beneficial, consider hitting all the react emojis and also drop a comment.